Introduction: Wood cutouts are a fantastic way to add a touch of personality and creativity to your home decor or DIY projects. Whether you’re a seasoned crafter or a beginner looking for a fun and accessible project, working with wood cutouts can be both enjoyable and rewarding. In this blog, we’ll explore the art of wood cutouts, from selecting the right materials to completing your masterpiece. Let’s dive in!
- Choosing Your Wood Material
- Plywood or MDF: The choice of wood is crucial. Plywood and medium-density fiberboard (MDF) are popular choices for wood cutouts due to their affordability and ease of cutting.
- Wood Thickness: Opt for wood that is between 1/8 to 1/4 inch thick, as this thickness is ideal for intricate cutouts.
- Sourcing Your Wood: You can find wood sheets at your local hardware store or online suppliers.
- Selecting Your Design
- Freehand or Templates: Decide whether you want to create your design freehand or use pre-made templates. Templates are great for beginners.
- Digital Designs: Explore online resources for a vast collection of designs that can be printed and traced onto your wood.
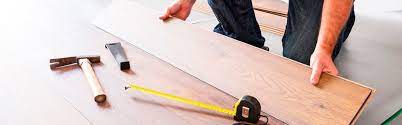
- Cutting Techniques
- Hand-Cutting: Use a coping saw, scroll saw, or even a jigsaw for larger cutouts. Ensure you have the right blade for precise and clean cuts.
- Laser Cutting: If you have access to a laser cutter, it can make the process incredibly efficient and precise.
- Preparing the Wood
- Sanding: Sand the edges and surface of your wood cutout to ensure it’s smooth and free of splinters.
- Priming: If you plan to paint your cutout, apply a primer to the wood for better adhesion and a more even finish.
- Painting and Decorating
- Color Selection: Choose colors that match your overall decor or theme.
- Techniques: Experiment with techniques like stenciling, decoupage, or distressing to achieve different effects.
- Sealing: After painting, seal your wood cutout with a clear varnish or sealant to protect the finish.
- Assembling and Displaying
- Mounting: Attach hooks or hangers to the back of your cutout for easy hanging.
- Grouping: Consider creating a collage of wood cutouts to make a striking wall display.
- Variety: Mix and match different shapes and sizes for a visually appealing arrangement.
- Maintenance
- Dust and Clean: Regularly dust your wood cutouts to keep them looking fresh.
- Repair: If your cutout gets damaged, use wood filler and touch-up paint to restore it.
- Sharing Your Creations
- Social Media: Share your wood cutout projects on social media to inspire others and connect with fellow crafters.
- Gifts and Sales: Consider gifting or selling your creations. Wood cutouts make thoughtful, personalized gifts and can be a small source of income.